
How to Create a Custom Z Table in SAP
Today you will learn how to create your first custom table in SAP and after that you will learn how to populate the custom table using ABAP.
| Tutorial Objectives |
| 1. Learn how to create custom z table (transparent table) in SAP. |
| 2. Learn how to assign data types for each table column. |
| 3. Know how to differentiate between data element type and built-in type |
| Prerequisites |
| SAP System Access: SAP GUI, ECC. |
| Authorization: Developer role, TCODE: SE11. |
I want to remind you again that every custom object created in SAP or ABAP must begin with prefix Z or Y because any other letters had already been reserved by SAP.
By creating a custom table (commonly referred to as a “Z table” or “Y table” ) in SAP, you will be able to store data for your specific needs. You also will learn how to assign each column’s data type using ABAP data elements and built-in types. So let’s get started!
A Step By Step Tutorial To Create Custom Table in SAP
Step 1. Execute TCODE SE11
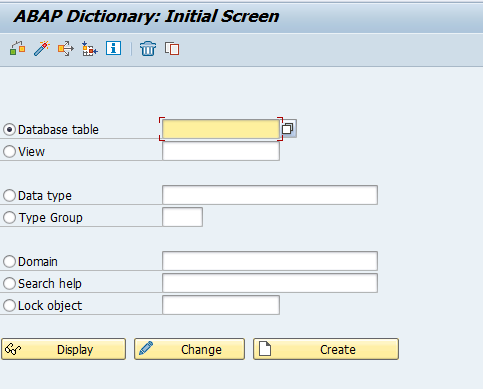
SE11 is the TCODE for ABAP Dictionary, where custom tables, along with other data objects, are created and managed.
As shown in the screen below there are several custom objects that you can create in ABAP Dictionary such as database table, view, data type, type group, domain, search help and lock object. But today we will be focusing on creating database table or also known as Transparent Table.
Step 2. Give a name to your custom table
In the Database Table input field, enter a name for your custom table, beginning with “Z” (e.g., ZEMPLOYEE). The “Z” prefix distinguishes your custom tables from standard SAP tables.
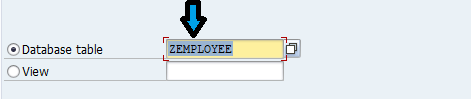
Next click Create to proceed.

Step 3. Fill in all these property fields
- Table description : Employees Table
- Delivery Class : A
- Data Browser/Table View Editing : Display/Maintenance Allowed
- Click on the Fields tab

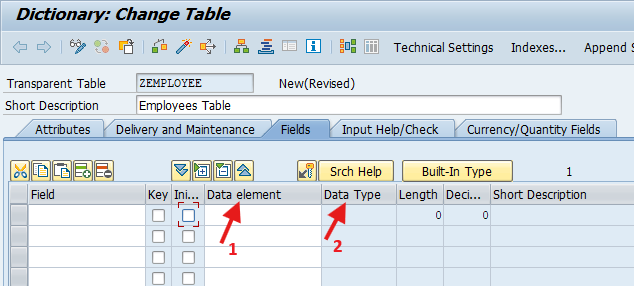
Step 4. Understanding Data Element and Built-In Type in Data Dictionary
When defining the fields and data types for your custom table, you will have the option to choose between Data Element and Built-In Type.
- Data Element Type consists of reusable objects that can be used in all of your custom objects such as tables and ABAP Programs, in Data element you can also add technical properties such as data types, field labels, search help.
- The Built-in Type consists of predefined types provided by SAP that you can use right away for your field such as CHAR, DATS (date field), TIMS (time field), INT1 (integer), etc. If you choose The Built-In types then you must provide the Short Description of your field.
Now we will create the table fields by using data element and also the built-in type.
Step 5. Enter MANDT as The First Field And Assign Data Element
Now the first field of your table should be MANDT.
What is MANDT? MANDT is a field that will be populated automatically by SAP to specify the client for your data records. Normally we have 3 clients in SAP such as DEVELOPMENT, QA and PRODUCTION client, each with their own client ID such as 101, 201, 801.
Right now you’re creating table in the DEVELOPMENT client, so this field should be populated with the client ID of your system, meaning that the table is client specific.
Enter MANDT in the field column, check the KEY and NOT NULL checkbox. Meaning that MANDT field is a primary key and cannot be empty.

Go to Data Element column and the Enter MANDT. MANDT is the name of data element, it consists of data type CLNT, the length and also the label so when you press ENTER in the Data Element field, all these values will appear automatically in the Data Type, Length, Short Description column.

Step 6. Enter The Second Column And Assign Built-In Type
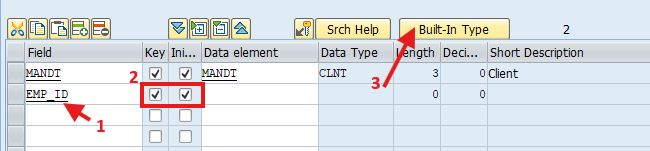
- Enter: EMP_ID
- Tick the KEY and NOT NULL checkbox
- Previously we’re using Data Element for MANDT field, now we will be using the Built-In Type for the EMP_ID field, click on the Built-In Type button. This will enable the Data Type column so you can choose the data types.
- In below picture, click on the Data Type search button.
- Double click CHAR type from the pop up window

Unlike data element where the Data Type, Length, Short Description were populated automatically, now you need to input them manually as shown below. Enter 3 as the length and Emp ID as the short description. If you need to assign data element then just click the Data Element button again.

Step 7. Enter The Rest of The Table Fields
Now enter all the other fields as shown below. Pay attention to each field’s types (Data Element or Built-In Type).
| FIELD NAME | TYPES | TYPE NAME |
|---|---|---|
| MANDT | DATA ELEMENT | MANDT |
| EMP_ID | BUILT-IN TYPE | CHAR (3) |
| EMP_NM | BUILT-IN TYPE | CHAR (25) |
| BIRTHDATE | DATA ELEMENT | PSAP_EEDOB |
| CITY | BUILT-IN TYPE | CHAR (20) |
Now here’s what your table will look like.

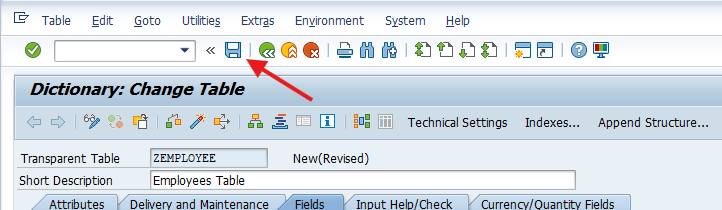
Step 8. Save And Activate The Table
After you have entered all the fields and its data types now we’re ready to SAVE and ACTIVATE this custom table. Click the Save Button.
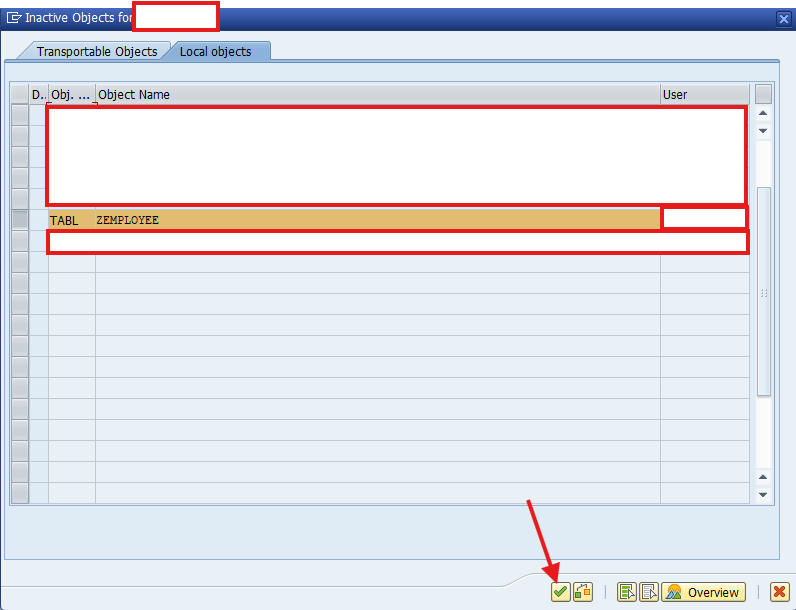
After that you will be prompted with the Transport Request pop up window, for this exercise we don’t need to transport this table to another client so just save it locally in your development client.
Click the Local Object button.

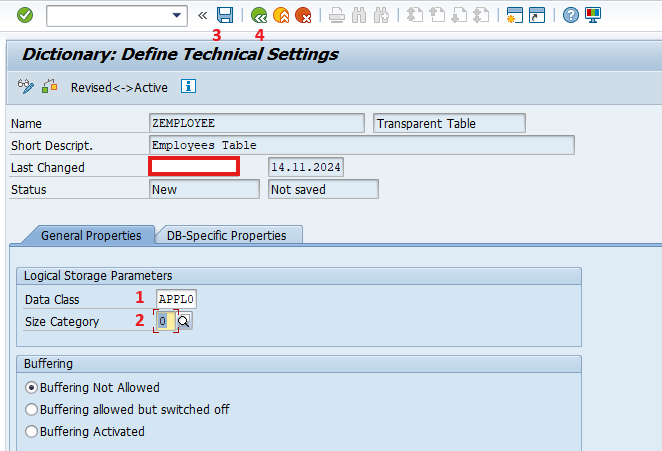
Before activating the table, you need to set the table’s technical settings such as its data class and category, so click on the Technical Settings button.

Enter the fields as show on the picture below:
- Data Class: APPL0
- Size Category: 0
- Click the SAVE button
- Click the BACK button
Now click the Activate button.

Click the Ok button.
If you see this log display without any red color then you have successfully activated the table.
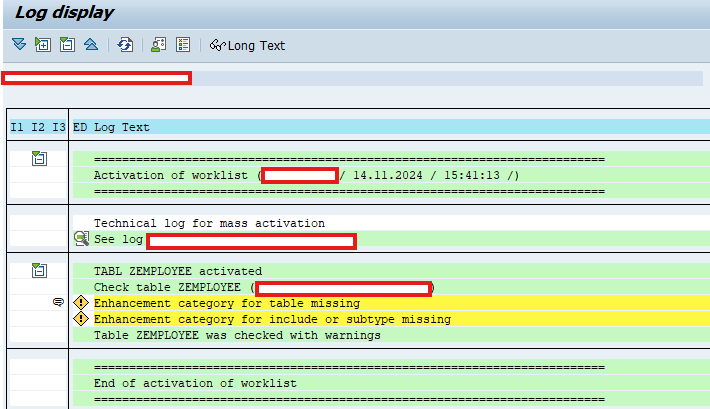
Now, click the Back button. You should see a status message confirming that your table has been successfully activated.

Conclusion
By using TCODE: SE11, You can create custom z tables to store various data such as configurations, master and transactional data even as a staging table. Custom tables can help minimize the risk of data inconsistencies and dependencies on standard SAP tables which might not fully meet users requirements.
Now by using ABAP you can query the data into an internal table and perform the CRUD operation in that internal table.
Share this tutorial with Fellow Geeks!