
How To Create A Simple ABAP Hello World Program
“Hello World” is like a magical phrase, marking the beginning of a journey into a new programming language and as the saying goes, “A journey of a thousand miles begins with a single step“, and for many of us, that single step in the world of ABAP programming was a simple “Hello World program”.
So in this simple ABAP tutorial you will learn how to take that first baby step and build the foundation to become a professional ABAPer.
| Tutorial Objectives |
| 1. Create Hello World Program in ABAP using ABAP Editor |
| 2. Save the program locally using Local Object. |
| 3. Display Hello World on screen by using the WRITE statement |
| Prerequisites |
| 1. SAP System: SAP GUI, ECC |
| 2. Authorization: Developer role, TCODE: SE38. |
ABAP Hello World Step By Step Implementation
Now here’s a tutorial on how to create a simple ABAP program example, the hello world!
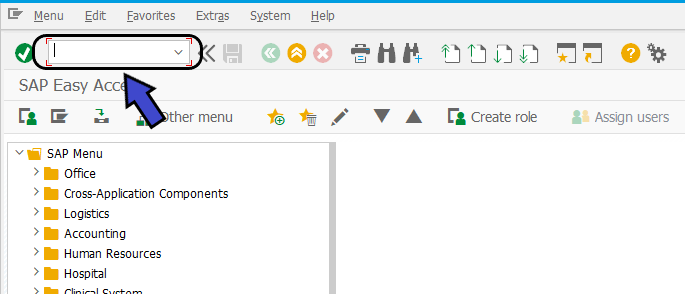
Step 1: On your SAP Easy Access screen, locate the command field bar in the upper left corner of your screen. This is where you’ll enter transaction codes to navigate through SAP quickly.
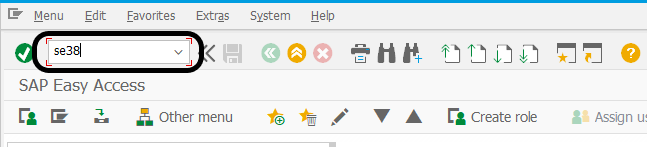
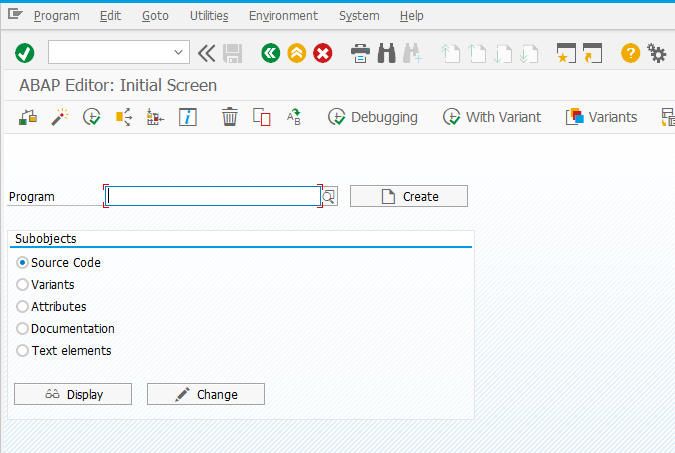
Step 2: In the command field, type in the transaction code SE38 and press Enter. This will open the ABAP Editor initial screen, where you can create, edit, and execute ABAP programs.
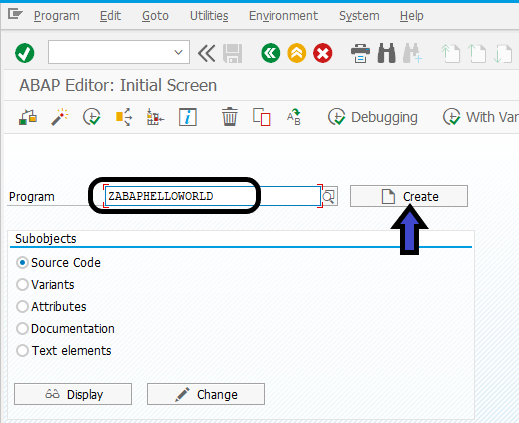
Step 3: Before creating your first ABAP Hello World Program, please remember that custom program names in SAP must begin with the prefix Z or Y. This distinguishes them as custom programs. In this example, let’s go with ZABAPHELLOWORLD as our program name and then click the Create button.
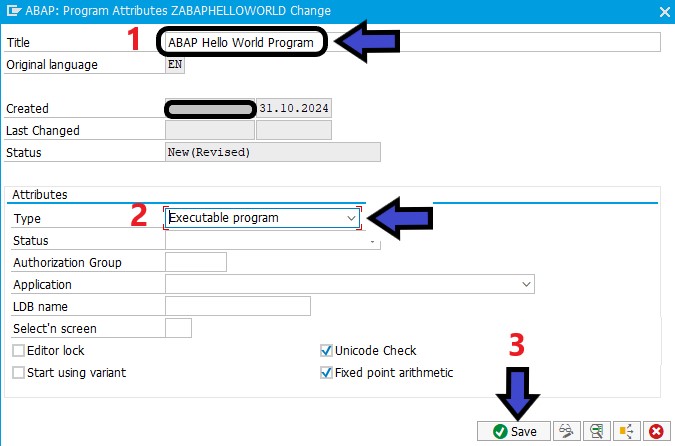
Step 4: Next, enter a title for your ABAP program. For this example, type “ABAP Hello World Program” Then, set the Type attribute to “Executable Program” and click the Save button.
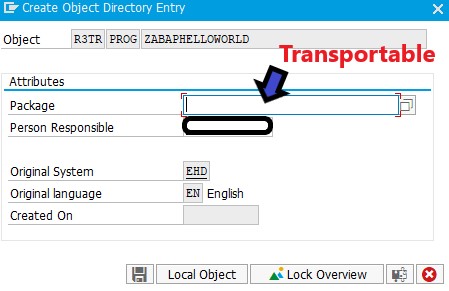
Step 5: Next you will be asked to enter the package name for your program. Typically, your Basis team has already created different package names for various SAP modules. Custom package names usually start with the prefix “Z” or “Y”, for example, ZFICO (for the FICO module), ZMM (for the MM module), etc.
If you add your ABAP program to a package name then the Basis team will be able to transport your program to another client, for example from Development to QA (Quality Assurance) client and also from QA to Production client using a Transport Request number.
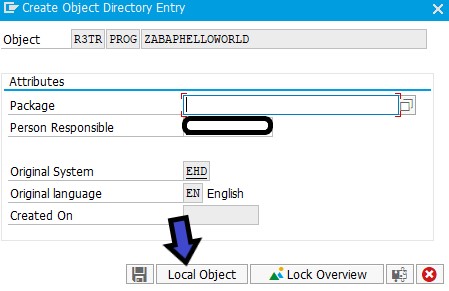
But if you don’t want to transport your ABAP program then you can click on the Local Object button and leave the package name empty. The Local Object will automatically assigned $TMP as its package name, it means it is saved to the current development client and won’t be included in any transport requests for migration to other clients.
In this example, let’s click the Local Object button.
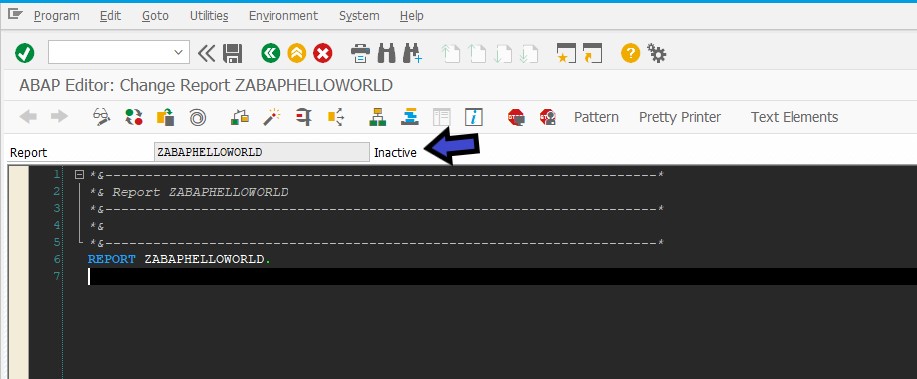
Step 6: Congratulation, you just created your first ABAP Program. But the status of your program is still inactive, so the program is still unable to be executed.
But before we activate the program, let’s code some ABAP first so the program can give you the Hello World output.
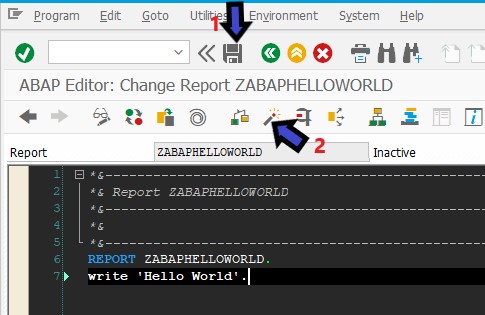
Step 7: To display “Hello World” as output in your ABAP program, you use the WRITE statement and close the string with a single quote and end the statement with a dot (.)
Please remember, that every syntax in ABAP is closed with a dot (.)
REPORT ZABAPHELLOWORLD.
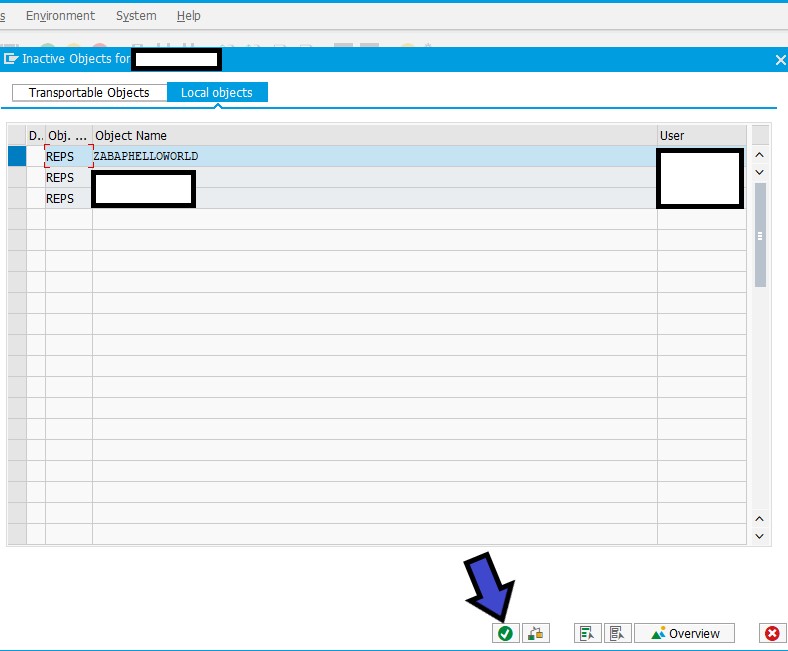
write 'Hello World'.Step 8: Now click on the Save Button, and then the Activate button.
After you click the Activate Button, click on the Ok Button to activate the program.
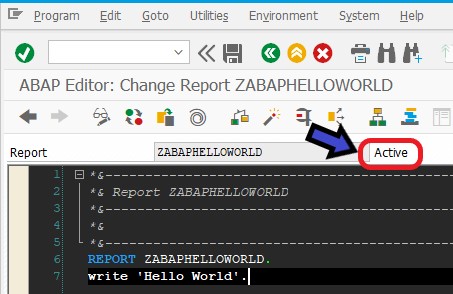
If the program has been successfully activated then the status will become Active.
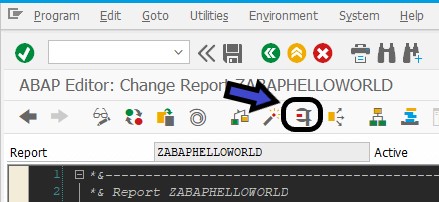
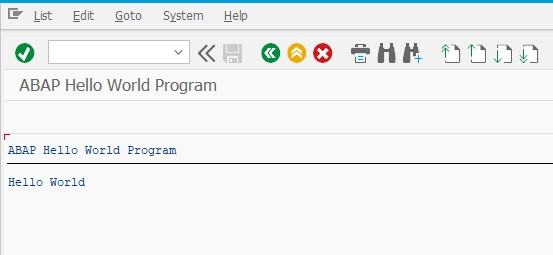
Step 9: To run the program, click on the Direct Processing Button (F8).
Now here’s the output of your first ABAP Hello World Program. Take a moment to enjoy your accomplishment, you did a great job!
Now that you know how to generate output using WRITE statement in ABAP program, let’s explore its potential further.
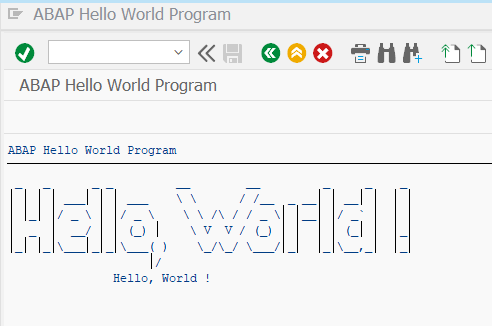
By adding : / after the WRITE statement, you can add multiple lines of output with line break on each line. Just take a look at below code.
Don’t forget to Save and Activate the program first before process the program.
REPORT ZABAPHELLOWORLD.

WRITE: / ' _   _      _ _         __        __         _     _    _       '.
WRITE: / '| | | | ___| | | ___    \ \      / /__  _ __| | __| |  | |      '.
WRITE: / '| |_| |/ _ \ | |/ _ \    \ \ /\ / / _ \| |__| |/ _` |  | |      '.
WRITE: / '|  _  |  __/ | | (_) |    \ V  V / (_) | |  | | (_| |  |_|      '.
WRITE: / '|_| |_|\___|_|_|\___( )    \_/\_/ \___/|_|  |_|\__,_|  |_|      '.
WRITE: / '                    |/                                          '.
WRITE: / '               Hello, World !                                   '.
Here’s the result!
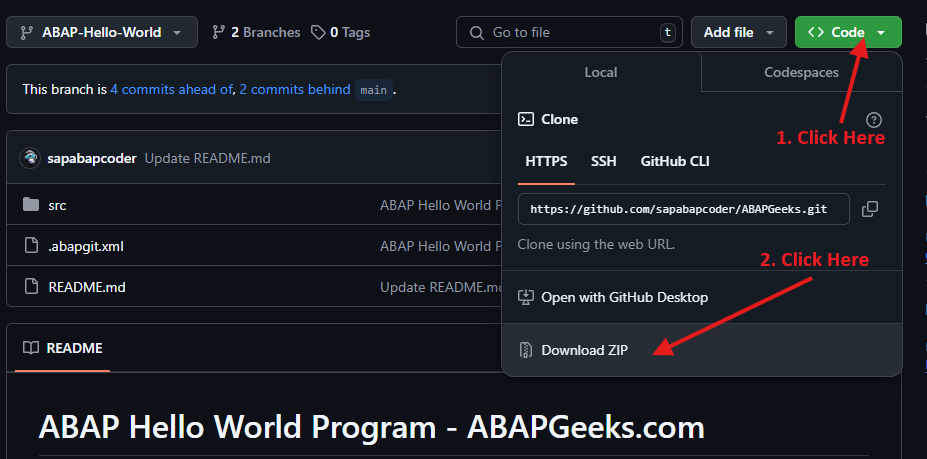
Download ABAP Hello World Source Code
You can download the full source code from this lesson right here.
https://github.com/sapabapcoder/ABAPGeeks/tree/ABAP-Hello-World
What’s Next?
Now that you have successfully created your first ABAP “Hello, World!” program, you’re on the exciting path to mastering ABAP programming. So let’s dive in!
- ABAP Development History Through The Years
- How To Declare ABAP Data Types
- How To Create Custom ZTable in SAP
- How To Create Internal Table in ABAP
- Learn ABAP CRUD (Create, Read, Update, Delete)
- Learn How To Use Control Structures in ABAP
- How To Generate Sflight Mockup Data For Testing
- Top 30 ABAP Job Interview Questions